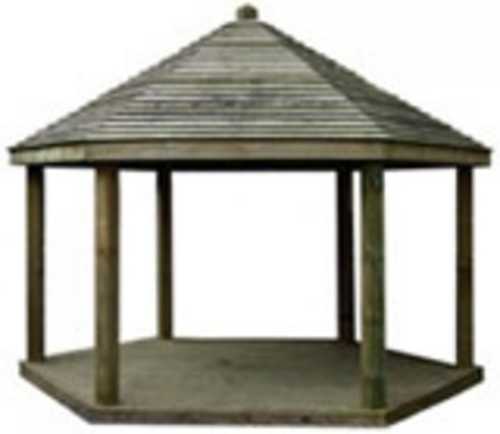
Constructing Your Dug-in Sunshade
Before You Start
- Do you need permission to erect a structure of this size?
- Check for utilities and any drainage problems
- If structure is near property ensure rain run off slopes away from property
- Clear the base area of grass, rubble etc.
- Mark out the base of construction with pegs and string, this will give a feel of the overall dimensions
- Check that the height of the finished building does not obstruct yours or neighbours view.
- Put membrane over base area and cover with timber chips or gravel to aid drainage
- If erecting sunshade with no floor, post holes will need to be dug at this stage
- Assemble all tools required as given in assembly instructions. Basic items required will be: spirit level, tape measure, string, plum line, screwdrivers, hammer, shuv holer for posts
- Lay out all the pieces of the project, ensuring all items required are easily identified, also all fittings are correct
- Wear suitable protective clothes, sturdy work boots, gloves and goggles if appropriate
Component List
Due to complexity of this structure you will need at least two competent installers to complete this project.
- 1 x centre boss
- 6 x wall plates (2025x125x50mm)
- 6 x long rafters (2470x125x50mm)
- 6 x short rafters (2260x125x50mm)
- 6 x fascia boards (2210x125x50mm)
- 60 x 1.8m x 125mm feather edge boards
- 30 x 2.4m x 125mm feather edge boards
- 6 x posts 2.4m if with floor or 3m if dug in
- Fixings
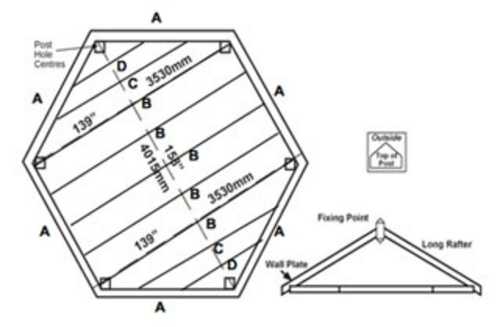
Post & Wall Plate
- Place the wall plates (B) out on the ground to create a true hexagon.
- Mark each internal ‘point’ as the centre of holes to be dug for the posts (H). The holes should be 250mm square and 600mm deep.
- Stand posts in each hole, with all recesses on the outside. Fix wall plate around the top of the post.
- Place wall plates horizontally into post in a true hexagonal position. Level and brace each post into vertical position.
- When all posts are vertical and parallel to each other, back fill with spoil and Postfix. Ram firm.
Roof
- Hold centre boss in centre of hexagon.
- Fix 2 long rafters (C) to centre boss (A) 125mm from top and fix long points to wall plate (B).
- Repeat for the remaining rafters and fix. Place short rafters (D) centrally between long rafters fixing to centre boss and wall plate.
- Cut roof cladding to fit roof (F&G) - this should overlap by one inch.
The information and advice in this article is provided in good faith and is designed to give general information and guidance. Any reliance you place on such information is therefore strictly at your own risk. If in doubt we strongly recommend you seek professional assistance.
If you need further advice with your purchase please ask our experienced staff, we will be happy to help!