
Garden advice
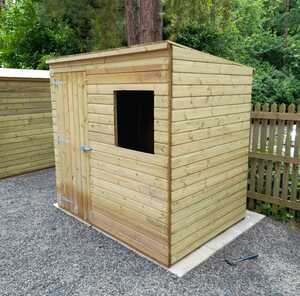
Constructing a Base for a Shed
Building a shed base is a crucial step in ensuring the stability and longevity of your garden shed. In this guide, we provide detailed tips and advice to help you construct a solid foundation for your outdoor structure.
How to build a shed base
It is important to build a suitable base for your garden building as without one the building will quickly deteriorate, leading to problems like sagging walls and roof or damp. The following steps will take you through how to build a base, including how to make formwork (wooden framework constructed to form concrete pad) and how to prepare and lay concrete. It is worthwhile taking special care and a small amount of time to ensure a good base is constructed. This will reap benefits in years to come.
Selecting a suitable site for your shed base
Try to visualise what the building will look like in the position selected. Make sure that access is going to be adequate for the intended usage. Take into account the distance from the site to the closest electricity and water points.
Design a base for your garden shed
A firm, level, and square base
Your base can take several forms, but whatever method is employed it is essential that the end result is above all firm, level and square. If you require a new base to be constructed, it is advisable to use a good local builder. However if you intend to build it yourself, this article could offer some guidance.
The best option would be to construct a solid concrete slab to the correct size for the building but you could use paving slabs, blocks or timber bearers. Bricks are not recommended unless set onto an existing base as they can sink individually.
Prepare the site by cutting back any infringing trees and bushes. Allow at least 12" (300mm) all around and 36"-48" above the roof of the building. The base must be firm, level, square and designed to suit the floor size of the selected building. Obtain the exact base size and add 1" (25mm) to length and width - use these dimensions to set out the base.
Timber bearers
Stopping rising damp
If you choose to use timber bearers, we suggest 3" x 2" (75mm x 50mm) pressure treated timber bearers complete with a damp proof course. You can lay these straight onto your ready prepared level site when you assemble your new building. Bearers will raise your building off the base altogether, stopping any damp from rising and encouraging air circulation. We recommend their use when your base is larger than the size of the floor.
If you have an area of firm, level ground, clear all vegetation from the selected site and carefully level and compact the soil. A 2" (50mm) layer of pea shingle laid on top will allow good drainage.
Explore Our Outdoor Building and Garden Shed Range
From standard sheds, roofing materials, and all the essential fixings, our garden shed and building range includes Apex and Pent sheds alongside specialised security sheds and a selection of roofing batten bundles. Improve and maintain your garden structures with our preservers and woodcare products, ensuring longevity and durability for your outdoor spaces.
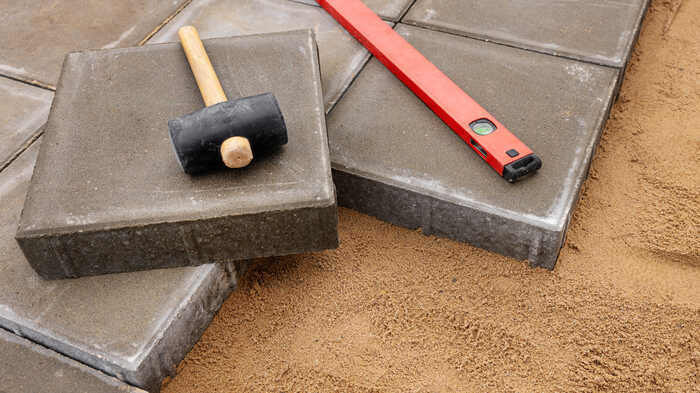
Rows of blocks or paving slabs
Spreading the load equally
If using rows of blocks or paving slabs, it is important they are laid in complete rows across the width of the building, i.e. at right angles to the pent or apex shaped end. Floor battens always run from shaped end to shaped end. If your shed is transverse (i.e. 8'x12' instead of 12'x8') please ask for a floor plan. The same principle will apply if you are laying your own timber or concrete bearers.
The rows may be up to 2' apart, but if your shed floor comes in two pieces then you need to ensure that you have a row where the floor sections meet. Buildings with a floor size over 8'x 7' and up to 12' x 8' tend to have floors that come in two equal halves: it is important to have a row centrally to support this join. Buildings over 12' x 8' may have their floors supplied in a greater number of pieces, so please check how your floor is supplied before constructing your base.
Remove all vegetation from the site and carefully level the overall area. Lay the supports with one at each end and correctly spaced in-between, ensuring each support is level to the next by using a spirit level and a straight edge.
Ensure these supporting rows are set on a firm sub-base and bed them onto a sand/cement dry-mix. They must be level over the whole site in order to spread the load equally and avoid the base sinking.
Concrete slabs or patio areas
If you have existing patios or old shed bases on which you plan to site your building, please check these are level and suitable. If the intended site is larger than the size of the building, we recommend it is raised off the base. This is in order to stop any puddles formed from soaking the floor. Fountain Timber can supply 3" x 2" (75mm x 50mm) pressure treated timber bearers with damp proof coursing (DPC) which are ideal for this purpose.
Building a concrete base for a shed
Solid and secure
If you have existing patios or old shed bases on which you plan to site your building, please check these are level and suitable. If the intended site is larger than the size of the building, we recommend it is raised off the base. This is in order to stop any puddles formed from soaking the floor. Fountain Timber can supply 3" x 2" (75mm x 50mm) pressure treated timber bearers with damp proof coursing (DPC) which are ideal for this purpose.
Concrete Shed Base Depth
For ordinary garden sheds, a thickness of 3" (75mm) is sufficient in most situations. On soft clay, or on larger buildings, increase the thickness to 4" (100mm) laid on 2" (50mm) of finely broken and compacted hard-core if required. Half the depth of the base (approx) should be above ground level.
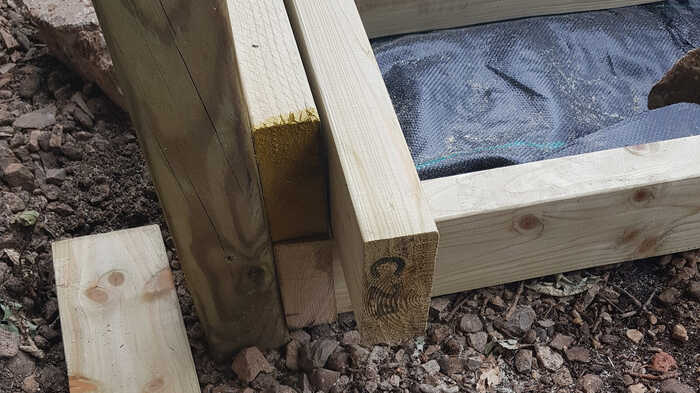
Replace the setting out strings on the pegs and check the original measurements. These strings are used for positioning the concrete formwork. This is made from 1" (25mm) thick timber and should be as wide as the depth of the concrete slab. Check the markings are still square by checking the diagonals again.
Use a tape measure, spirit-level and try-square to set off the formwork accurately. This is nailed onto pegs driven into the ground. These pegs should be sited on the outside of the formwork in each corner and every 2' (600mm). It is very important that the pegs do not protrude above the top of the formwork as this will make the levelling off the concrete very difficult. Ensure the top of the formwork is carefully checked and use a long spirit level to ensure it is level all round.
Concrete is a mixture of 'all -in' ballast, cement and water. For this type of base, they are mixed to the ratio of 1 part cement to 5 parts 'all-in' ballast.
Ballast
'All-in' ballast (20mm) is usually sold in 40kg bags at your local builder's merchant or DIY superstore. 1.25 x bags produce approximately 1 cubic foot of concrete. Therefore, the formula to calculate the amount of ballast required is as follows:
Example
Shed base = 2.44m long x 1.83m wide x 7.6cm deep
Volume = 2.44m x 1.83m x 7.6cm = 34 cm₃
Add 1/3 for compacting = 0.11 m₃
'All-in' ballast required = 0.45 m₃
0.45 x 1.25 = 20 bags of 20mm 'all-in' ballast
Add water gradually to the mix until the whole pile is uniform in colour and sufficiently workable to use. Do not make the mix too wet as this will weaken the concrete. Note how much water has been used and use the same quantity for each mix. Hire a cement mixer for making large quantities of concrete.
Cement
1 bag (50kg) of cement mixed with 'all-in' ballast in the ratio of 1:5 makes:
24 sq ft of concrete 3" thick or 18 sq ft of concrete 4" thick. ie
3" thick base cement = 2 bags for a 8' x 6' base (48 sq ft)
4" thick base cement = 3 bags for a 8' x 6' base (48 sq ft)
Quantities for other size bases may be worked out using these figures.
Mixing
Try to mix alongside the base site so that the concrete can be placed by shovel, otherwise use a wheelbarrow. Use a plastic bucket (3 gallon) for accurately measuring materials. Use another bucket for measuring water.
Mix well in the proportion of 1 bucket of cement to 5 buckets 'all-in' 20mm ballast.
Add water gradually to the mix until the whole pile is uniform in colour and sufficiently workable to use. As before, remember not to make the mix too wet as this will weaken the concrete. Note how much water has been used and use the same quantity for each mix.
Laying the concrete
Place a layer of concrete into the formwork. Compact this down with a rammer, taking particular care to push the concrete into the corners and edges.
Tap the sides of the formwork with a hammer to help produce a solid edge to the slab. Continue placing layers of concrete into the formwork and compacting until full. Use a tamping beam with a chopping and sawing motion across the slab, working from one end to the other. This will level off the concrete, leaving it flush with the top of the formwork.
Tamp the concrete flat as it is poured. After tamping, the concrete should be smoothed out with either a wooden or a plastic float to allow the batons of the floor to sit evenly. The concrete must not be allowed to dry out too quickly or be damaged by frost whilst wet. Use plastic sheeting to cover the concrete until it is hard and spray with water for several days to allow it to dry out slowly.
When the base is ready, remove the formwork and tidy around the base. Fill the 6" (150mm) around the edge of your new base with pea shingle to prevent 'splash-back' as rain drips to the floor.
How can we help?
The information and advice in this article is provided in good faith and is designed to give general information and guidance. Any reliance you place on such information is therefore strictly at your own risk. If in doubt we strongly recommend you seek professional assistance.
If you need further advice with your purchase please ask our experienced staff, we will be happy to help!