
Constructing Your Featheredge Fence
With its traditional aesthetics, durability, and versatile nature, featheredge fencing has remained one of the most popular fence choices for homeowners in the UK. Despite its simple, classic appearance, constructing a featheredge fence is not for the DIY novice, and it would be advisable to seek professional advice before embarking on your project. If you feel confident in your skills, however, here is a handy guide for the steps and materials needed to create a beautiful and durable featheredge fence.
Materials Selection
The foundation of a sturdy fence
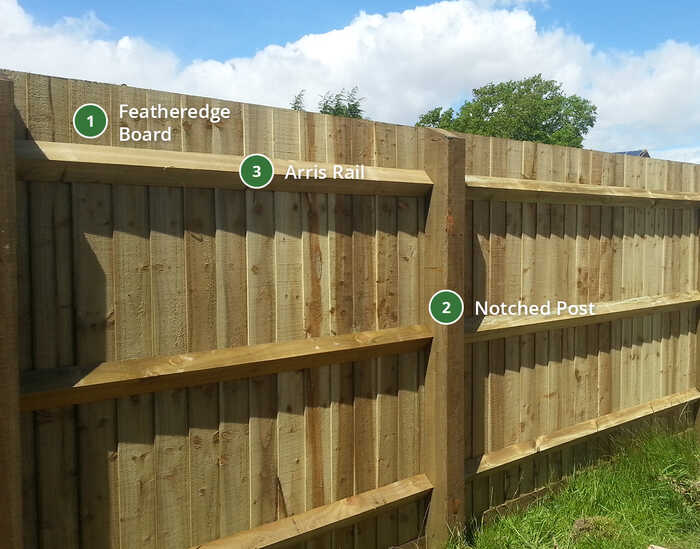
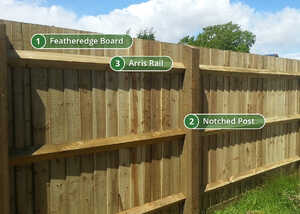
FEATHER EDGE BOARD (Pales) (1): These are the vertical boards that make up the main body of the fence. Various sizes are available to suit your preference and needs.
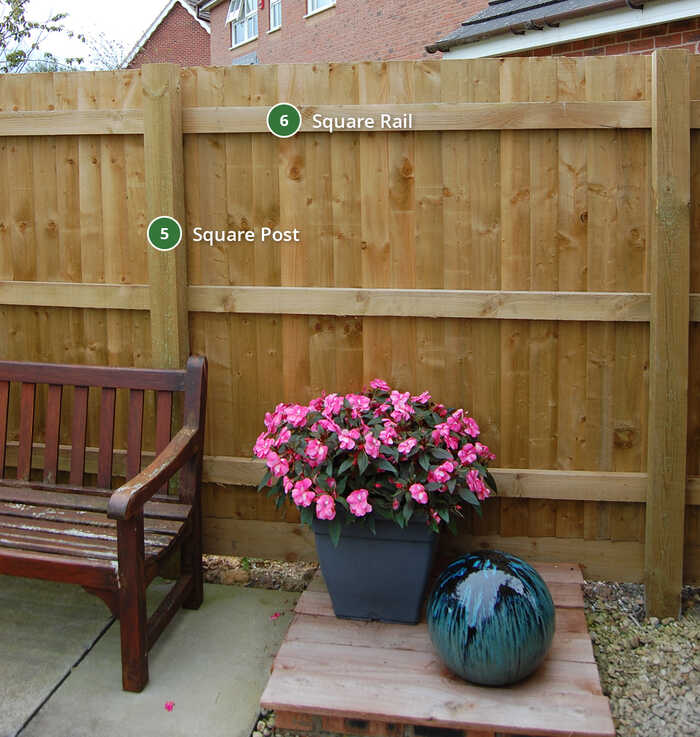
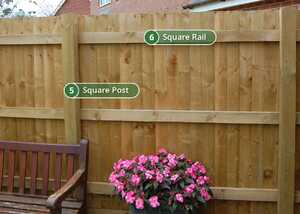
POSTS (2): The choice between notched posts and square posts depends on your design. Notched posts are suitable for use with Arris rails, while square posts pair well with square rails. Ensure posts are securely anchored, typically by digging them into the ground and securing them with PostMix.
RAILS (3): These horizontal frames provide support for attaching the boards. Arris rails are designed to fit the pre-cut notches on notched posts, while square rails are used with square posts.
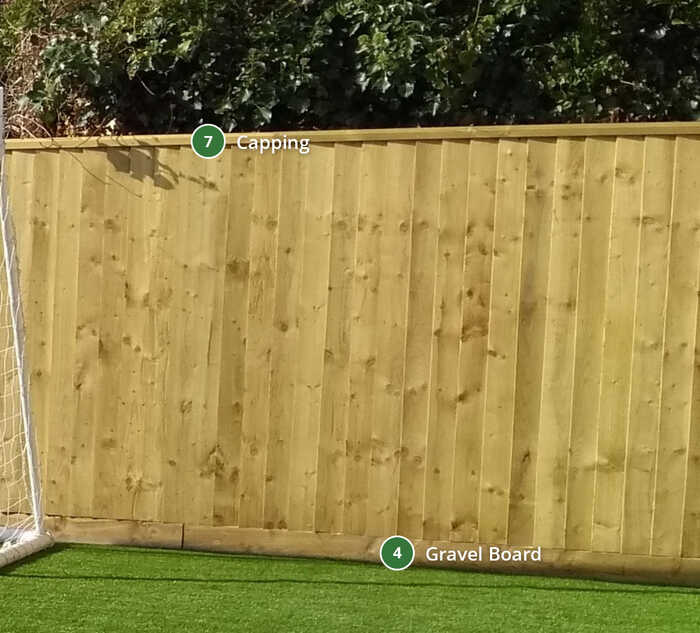
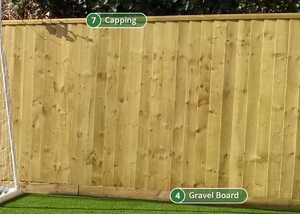
GRAVEL BOARD (4): Placed at the bottom of the fence, the gravel board serves to protect against weathering and adds a polished finish.
CAPPING (7): Capping strips are fitted on top of the boards to protect them and give the fence a refined appearance. A 50x22mm counter rail is recommended when using capping. There is no need for a counter rail when using channel capping as the boards will fit into the channel.
NAILS: You'll need 50mm galvanised nails to attach the pales, 75mm galvanised nails for securing the gravel board, and potentially for shaping the Arris rail.
POSTMIX: This high-performance concrete sets in under 10 minutes, making it ideal for securing fence and gate posts.
In addition to these core materials, consider other accessories like gates, hinges, bolts, handles, and post caps to complete your featheredge fence project.
Construction
Building Your Featheredge Fence
Now that you have your materials ready, here's a step-by-step guide to constructing your featheredge fence:
Clear the Area: Remove any old fencing or vegetation and peg out the fence line.
Dig Post Holes: Dig post holes to a depth of approximately 600mm at regular intervals (typically every 1.8m, 2.4m, or 3m).
Ensure Level Ground: Check that the fence line is level.
Secure the Posts: Place small stones in the bottom of each hole and use struts to hold the post in place. Ensure the post is upright, notches are on the correct side, and the post face aligns with the fence. Fill the holes with PostMix, allowing the concrete to slope slightly away from the post and be slightly below ground level.
Install Arris Rails (3): Arris rails may need to be cut to size to accommodate joints where necessary.
Attach Gravel Board (4): Ensure the gravel board is level along the length of the fence, even if it means adjusting the ground level slightly.
Attach Feather Edge Boards (1): Overlap the boards by 25mm to account for expansion and contraction. Use 50mm galvanized nails, placing one nail per pale per rail to allow for movement with changing weather conditions.
Capping (7): Install capping strips on top of the boards to protect them and provide a neat finish.
At Fountain Timber, we offer a wide selection of featheredge boards, rails, and posts in various sizes to help you create the perfect fence. If you need assistance in determining the quantity of materials required, our easy-to-use Feather Edge Calculator can be a valuable tool.
How can we help?
Constructing a featheredge fence can be a rewarding project, but it's essential to approach it with care and precision. The information provided here is intended to offer general guidance. If you have any doubts or need further assistance, we strongly recommend seeking professional advice. Our experienced staff at Fountain Timber are always here to help you make informed decisions and create the fence of your dreams. Your satisfaction and the longevity of your fence are our top priorities.