
Constructing Your Pony Fence
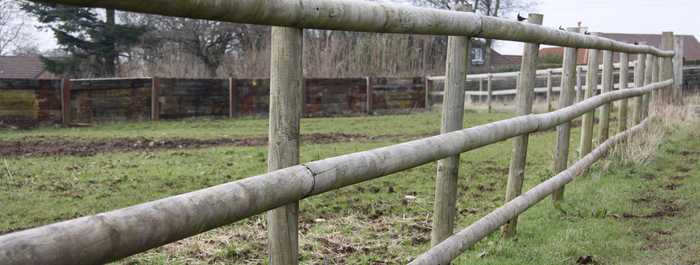
A traditional Pony Fence has a 3 rail post and rail fence with round posts and half round rails. All of the timber should be pressure treated with preservative. All ground contact fencing materials supplied by Fountain Timber are always pressure treated to UC4.
Choosing your materials:
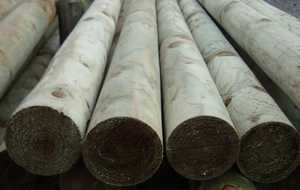
Posts
Posts should be 1.65m long by 100mm diameter, machined to uniform size. One end should be pointed to make it easier to drive into the ground.
Alternatively in very soft ground, or for added security, a stronger fence is provided by excavating holes for the posts and backfilling with PosMix.
Rails
Rails - 3.66m long, half-round rails -size across the sawn face ranges from 80mm to 120mm.
You will also need end grain preservative and Galvanised nails (100m long nails are required).

Quantities and Measurements
Allow for posts every 1.8m along the length of the fence and remember to add one additional post to finish the run of fence. If digging holes for the posts allow between half and one bag of PostMix per post. You will need 3 rails every 3.6m and 6 nails per rail.
Safety & Tools
You will need safety glasses, stout gloves and safety boots. You will also need to wear a safety hat when using a fence-post driver. You will also require a hammer, spirit level, fence-post driver, and long crowbar. The post driver, crowbar, and spirit level can be hired from all good tool hire companies.

Construction
Preparing the area: Clear the line of any old fence or undergrowth and peg the line.
Installing the posts: You will need to drive the posts 400mm into the ground. Begin by putting a chalk mark at 1.25m from the top of the post. Make a 400mm deep pilot hole in the ground with the crowbar. Stand the stake in the hole and use the post-driver to drive the post into the ground. Remember to stop and check regularly that the post is upright. Take every care to ensure the post-driver does not catch the top of the post causing it to hit the user - Under all circumstances, we recommend the user wears suitable safety headwear. To space, the posts cut a rail to precisely 3.6m long and mark the centre (1.8m). Use this rail as the template for all spacing. Put the next post in at 1.8m distance from the first.
Attaching rails: As the rails have a rustic finish, the length of each may be slightly less or more than 3.6m So with this in mind you can begin…. Lay your rails out on the ground in situ, this will allow you to put the posts in position to suit the rails. You will probably have to cut every rail to length; in order to preserve the integrity of the timber, treatment remember to brush on End grain preservative.
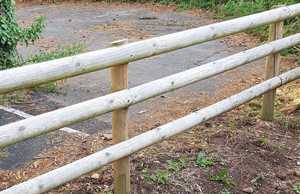
The top rail wants to be just below the top of the post, at approximately 1.2m high. Other rails should be spaced 400mm from centre to centre. This will leave the bottom rail approximately 300mm off the ground. If necessary, you can alter the spacing to your own requirements.
To avoid having all the joints on the same posts, cut the first rail to span two posts. Fix this rail to the top, then put in a third post and fix the middle rail. Always work one post in front. Because the rails taper it will look better if you fix butt to butt.
Use 2 x 100mm galvanised nails on each fixing (i.e. 6 per rail), driving them in at a slight angle to each other.