How To Build Your Own Raised Sleeper Bed
Creating a raised sleeper bed in your garden can transform your outdoor space, providing a beautiful and practical area for planting. As well as adding an element of rustic charm to your garden, timber sleepers are incredibly versatile, suitable for everything from vegetable patches to decorative garden features. This guide will take you through the steps to build your own raised sleeper bed, focusing on the selection of materials, construction, and those all-important finishing touches.
Which timber to choose for raised sleeper bed?
Softwood versus hardwood
The success of any raised sleeper bed comes from selecting the right kind of timber. The two basic options for your sleeper project is either softwood or hardwood — most commonly green oak. UC4 treated softwood sleepers are the ideal choice for ground contact beds; prized for their affordability and lighter weight, making them easier to handle and ideal for a variety of garden projects like pathways, steps, and, of course, raised beds. While they offer a blend of versatility and eco-friendliness, they might not boast the durability of their hardwood counterparts.
Meanwhile, green oak sleepers bring an added robustness and strength to your garden projects and their natural hardiness and aesthetic appeal make them a popular choice. Oak sleepers, when dried, gain extra durability and a smooth finish that adds a touch of elegance to any garden design.
Both hardwood and treated softwood sleepers have their benefits, and your choice will depend on your specific needs, budget, and the overall aesthetic you're aiming for in your garden. Fountain Timber’s range of charred brushwood sleepers, for example, are the perfect choice for adding a rustic quality to your landscaping project. Each sleeper is charred and brushed to achieve a unique enhanced grain finish.


size and positioning of your raised bed
Attention to detail
Before you start building, consider the size and position of your raised bed. The dimensions will depend on what you plan to grow and the available space in your garden or allotment. If you're constructing multiple beds, ensure there's enough space between them for easy access and movement.
It's also important to factor in the orientation of your raised bed to maximise sunlight exposure, essential for most plants to thrive. Also, think about water accessibility; your bed should be within reach of your watering system to ensure easy maintenance. Keep in mind the aesthetics of your garden, too; the raised bed should complement its surroundings and not obstruct views or pathways.


Constructing the base of your raised sleeper bed
Creating a stable foundation
Sleepers are by nature hugely versatile, and it's possible to build a raised bed to practically any size and dimension to suit your garden's needs. But for a standard bed, begin by laying your chosen sleepers on the ground to form the desired shape, typically using 2.40m sleepers x approx. 60cm high (2 sleepers)
The sleepers can be laid directly on various surfaces, including soil, grass, or concrete. Some prefer to prepare a more stable foundation using concrete or hardcore, but this is optional. Secure the sleepers at each corner with long timber screws to ensure a solid base.


adding layers to your sleeper bed
Increasing depth and dimension
After the base is secure, you can add more layers to increase the depth of your raised bed. This involves placing additional sleepers on top of the base layer, staggering the joints for added stability, much like bricklaying. Secure each new layer with long screws to tie the structure together. The number of layers will depend on your desired bed height and the types of plants you wish to accommodate.


Finishing touches to your raised sleeper bed
Added protection and growth
For added durability, especially when placing your raised bed directly on the ground, consider lining the inside with a membrane. This creates a barrier, protecting the timber from wet soil and extending the life of your raised bed. Alternatively, using weed control fabric can help suppress weed growth without chemicals.
Finally, fill your raised sleeper bed with a suitable growing medium. Consider using a mix of compost, topsoil blended loam, manure, and soil improver to provide a rich, nurturing environment for your plants. Bracken down is a superb medium base for planting a multitude of plants and vegetables, while sea shells is a excelled natural way of keeping slugs and snails away from plants.
For improved drainage, place a layer of cobbles or hardcore at the bottom of the bed. And to help retain moisture, top the soil with a layer of high-quality bark mulch or slate chippings.


How can we help?
Building a raised sleeper bed is a rewarding project that can enhance the functionality and aesthetics of your garden. Whether you opt for beautiful planed and pressure-treated smooth sleeper or hardy green oak, the key is to choose materials that fit your garden's design and your practical needs. With some planning, effort, and creativity, you can create a stunning raised bed that will serve as a focal point in your garden for years to come.
As ever, this article shares insights and general advice with good intentions. Following this information is entirely at your discretion, and it's wise to consult a professional if uncertain. Should you need more help with your purchase, our team is always here to assist you.
Decking Advice
Decking Gallery
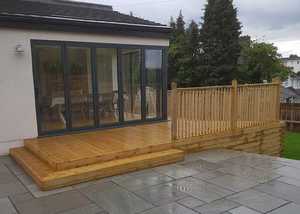
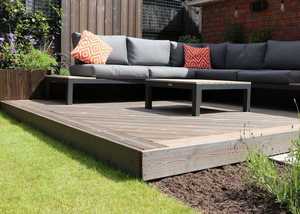
Is your decking looking tired and worn? Looking for some inspiration? We've put together a gallery of images from our trade customers to help.
Choosing Your Decking
Having a nice deck is one of the most popular ways of adding value to your home while creating a perfect place for outdoor eating, entertaining or just relaxing and enjoying warm summer days.
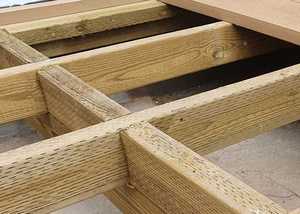
How to Build Your Outdoor Decking
Before starting a garden decking project it is important to have a clear plan: this step by step guide explains all the stages involved in creating the perfect timber deck.