
Constructing Your Panel Fence
Choosing your materials:
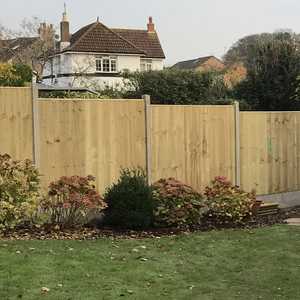
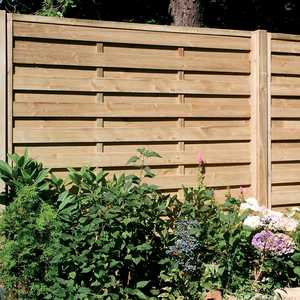
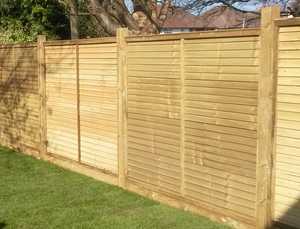
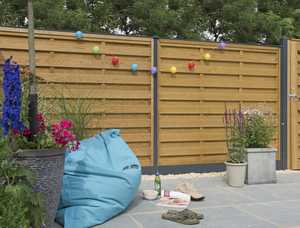
Fencing Panels
Fencing panels are available in a wide selection of styles and sizes. They are traditionally 6' or 1.8m wide and should be fixed to either 75mm x 75mm or 100mm x 100mm posts. The width of a panel is not important when constructing a new fence. However, when ordering replacement panels double check the size of the existing panels as some may be 1.83 (6') or only 1.8m (just under 71") and therefore may not fit the gap between the existing posts. We strongly recommend that all of the panels and posts used are pressure treated with preservative, or dipped in preservative. Fencing materials supplied by Fountain Timber are pressure treated with the latest preservative and only a small selection of panels can be supplied as dipped.
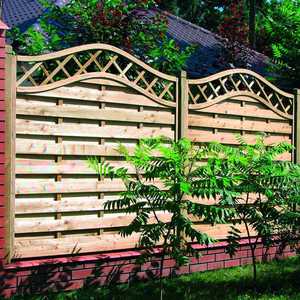
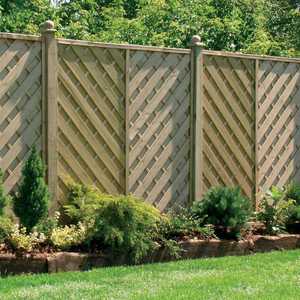
Please note - Whilst fence panels benefit greatly from pressure treatment, decorative panels are constructed using light frame and infill timbers. This means without regular maintenance they are prone to fungal and insect attack if in direct ground contact. To benefit from additional years of service from decorative fencing we recommend:
Firstly, do not place in direct ground contact and use an easy to replace gravel board if possible.
Secondly, do not mound soil up against the face of panels and treat your constructed fence regularly during its lifetime with a proprietary fencing product.
Please note: Whilst we offer a free 10-year replacement undertaking on our treated products for ground contact ie post, fence panels are not covered by this warranty as we cannot treat light framed manufactured products to this standard.
Timber, Durapost or Concrete Posts
There is a choice of several post types and sizes - Timber posts either 75mm x 75mm that suitale mostly for lower fences or 100x100mm that are rocommended for higher fences or exposed positions. These are available as sawn timber or for a higher quality finish use our planed posts.
Remember always purchase timber posts that are pressure treated to User class 4 as they are obviously in continual ground contact.
Slotted H posts - both concrete or Durapost are available to make construction easier by fixing the posts and simply sliding the panel in between the posts..
Posts can either be dug into the ground or fixed using spiked post supports, such as Fence Mate. For stony or made-up ground, digging can often be the safer option. If you decide to dig posts into the ground you will need Postmix, a mixture of cement and sand to create a solid foundation.
If using spikes, the fence posts can be the same length as the panel is high. If dug in, we recommend 600mm in the ground, i.e. a 1.8m high panel would require a 2.4m post.

Gravel board
A gravel board has the benefit of lifting the panel clear of the ground and removing the panel from ground contact. Gravel boards are normally 150mm x25mm, but remember to check that your gravel boards and panels are the same length. You may require a longer post if you use a gravel board to get at least 600mm of the post in the ground.
Clips
Clips are usually used to fix panels between the posts. Fountain Timber offers a choice of clips: the type of clip you use will affect the spacing of your fence posts.
Quantities & Measurements
Divide the length of the fence by the length of the panel plus one post to calculate the number of panels and posts required. Remember to add one additional post to finish the run of fence and allow one bag of postfix per post.
Safety & Tools
You will need stout gloves and safety boots, as well as safety glasses if using power tools.
You will also require a hammer, spirit level, long crowbar and shuv-holers. If you are using a spiked post support system, you will also require a drive-in tool to avoid damaging the spikes.
Construction
Preparing the area:
Clear the line of any old fence or undergrowth and peg the line. If there is a slope, work out the steps required.
Installing posts:
If you are using post spikes, make a pilot hole with a bar. The drive-in tool protects the top of the spike and allows corrections but check regularly that it is driving square. If you are digging in, keep the hole as small as practical: put 100mm of gravel or similar in the bottom of the hole, place the post in and use struts to hold the post in place and infill with Postmix.
When spacing your posts, remember that the type of clip you intend to use will affect the gap required.
Remember to check that the post is upright, square with the line and at the correct spacing. Fill with post-mix to ground level. Ideally, the concrete should be sloping slightly away from the post.
Attaching panels:
The post-mix will firm quite quickly: attach the panel to the first post and use this as a guide for the second post. Keep checking to ensure the posts are upright.
The information and advice in this article is provided in good faith and is designed to give general information and guidance. Any reliance you place on such information is therefore strictly at your own risk. If in doubt we strongly recommend you seek professional assistance.